

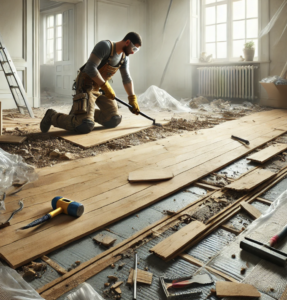
Floor demolition looks simple from the outside. A few tools, some elbow grease, and the old surface disappears. In real life, floor demo is one of the most important phases of a renovation because it reveals what’s underneath, sets the tone for the build, and can either keep a project moving smoothly or create expensive surprises. The best demos are planned, contained, and intentional, with a focus on safety, cleanliness, and protecting the structure you are keeping.
This guide lays out a clear, professional-grade process for floor demo, from the first walk-through to the final cleanup, with practical details that apply whether you are removing tile, hardwood, vinyl, laminate, or carpet. ✅
Pre-Demo Planning and Scope: What Is Being Removed and What Stays
A successful floor demo starts with decisions, not demolition. The scope must be crystal clear. The demo plan should identify exactly what flooring is being removed, what base layers are included, and what needs to remain untouched. That includes trim, baseboards, toe-kicks, cabinetry edges, stair parts, thresholds, plumbing penetrations, and HVAC registers.
A thorough scope also accounts for transitions between rooms. Floor heights change when materials change, and demo can expose uneven slabs, dips in subfloors, or old patchwork that was hidden under underlayment. Industry coverage consistently shows that demolition can uncover conditions that affect the remodeling budget, especially when hidden defects appear after materials are removed. 🧱
Authority link: Consumer Reports – Demolition knocks a hole in the remodeling budget
Planning also includes schedule logic. Demo is loud and disruptive, so it should be sequenced to keep trades efficient. If cabinets are staying, floor demo needs to protect them. If cabinets are coming out later, demo should avoid wasting time on delicate cuts that will be removed anyway.
Safety, Containment, and Health Checks: Doing Demo Without Creating a Hazard
Floor demo creates dust, flying debris, sharp edges, and exposure risks. Before any tool touches the floor, basic safety controls go in place: PPE, containment, air movement strategy, and a plan for debris handling. Respiratory protection matters because demolition can disturb older materials, adhesives, and construction dust that becomes airborne.
Demolition and renovation safety guidance emphasizes that remodeling work introduces evolving jobsite hazards, including exposure to materials that were safe while encapsulated but hazardous once disturbed. 😷
Authority link: ECMag – Demolition and renovation safety
Older homes deserve extra caution. Lead-based paint in trim or nearby surfaces can be disturbed during removal, and certain legacy flooring components may contain asbestos. Compliance and lead-safe practices are widely referenced in renovation guidance and should be treated as non-negotiable when the home’s age suggests risk.
Authority link: R&R Magazine – Hazardous building materials and renovation activities
Containment is about keeping dust from becoming a whole-house problem. Plastic barriers, taped seams, floor protection in traffic paths, and a dedicated debris route help keep the home livable and reduce cleanup time. For occupied homes, “cleaner demo” expectations have become part of modern remodeling standards, especially when homeowners remain in the space. 🧼
Authority link: Pro Remodeler – Construction practices coverage
Site Prep: Protecting the Home Before the First Pry Bar Moves
Site prep keeps the project from damaging what you plan to keep. All furniture and movable items should be removed from the demo zone. Remaining fixtures get covered. Doorways and adjacent surfaces get protected. HVAC registers within the room can be temporarily sealed to reduce dust migration, and return air pathways should be considered so dust is not pulled into the system.
Next comes utility awareness. Floors often hide unexpected electrical runs, low-voltage wiring, radiant heat systems, plumbing lines near slab edges, and fasteners that penetrate further than expected. A careful walk-through with the right assumptions prevents accidents.
Tool staging matters too. Having the right blades, scrapers, pry tools, and demo bars reduces the temptation to “make it work” with the wrong tool, which is how damage happens.
Selective Removal: Pulling Up Flooring by Material Type
Floor demo is not one universal method. Each surface has a removal pattern that minimizes damage to the substrate and speeds up cleanup.
Carpet and pad removal typically moves fastest. The carpet is cut into manageable strips, rolled, and taped. Pad staples are pulled or scraped. Tack strips come up last, carefully, because they splinter and leave sharp nails behind.
Laminate and floating floors are often the cleanest demo because they click together rather than glue down. Removing baseboards first helps avoid cracking boards unnecessarily. Expansion gaps at walls guide the best starting point for unclicking planks.
Hardwood can be simple or stubborn depending on how it was installed. Nail-down floors may require prying and cutting sections for leverage. Glue-down hardwood often becomes an adhesive removal project after boards come up.
Tile and stone removal is the loudest and most vibration-heavy. The tile breaks, mortar fractures, and dust skyrockets without containment. Demo hammers, chipping tools, and pry bars are common, but the goal is controlled removal, not chaos. Protecting the subfloor or slab is crucial because cracks or gouges can turn into prep work later.
Professional training content often frames this approach as “surgical demolition,” where the focus is removing exactly what is necessary while preserving what matters. ✂️
Authority link: Journal of Light Construction – Surgical Demolition
Adhesive, Mortar, and Underlayment Removal: The Step People Underestimate
The most time-consuming part of floor demo is frequently what remains after the surface is gone. Thinset, mastic, glue, self-leveling remnants, and underlayment layers can be harder than the flooring itself.
On slabs, grinding is common for thinset and adhesive removal. Dust management becomes critical, and equipment selection should match the scale of the project. On wood subfloors, aggressive grinding can remove too much material or weaken the surface, so scraping, controlled sanding, or subfloor replacement may be the better option.
Many remodeling schedules get delayed right here because the floor looks “mostly removed,” but the substrate is not ready for the next installation. The process should define a clear endpoint: clean, flat, structurally sound, and compatible with the new system.
Subfloor and Slab Evaluation: Checking Flatness, Moisture, and Structural Integrity
Once the old system is removed, the real inspection begins. Subfloors should be checked for squeaks, deflection, water staining, rot, delamination, and fastener problems. Slabs should be checked for cracks, spalling, and high spots. Flatness matters because modern flooring systems demand tighter tolerances than many older homes provide.
Moisture testing is also important. Installing new flooring over a wet slab or damp wood can lead to failure. A disciplined demo process includes documenting what was found and deciding whether repairs, leveling, or replacement is needed.
Home building and remodeling news frequently emphasizes how building materials and installation standards continue evolving, and flooring systems are no exception. Staying aligned with current building and product information keeps the project from relying on outdated assumptions. 🏠
Authority link: Builder Magazine – Building products and residential construction news
Repairs and Surface Prep: Making the Substrate Ready for the New Floor
This stage turns a demolition site into an installation-ready surface. On wood, repairs can include replacing sections of subfloor, re-fastening panels, adding blocking, or addressing squeaks. On concrete, prep may include patching cracks, filling low spots, and grinding down high points.
In some cases, self-leveling underlayments are used to correct irregularities and create a clean plane for tile, vinyl, or engineered wood. When used properly, these materials can speed the transition from demo to install, but they depend on correct priming and surface conditions.
Debris Handling, Disposal, and Cleanliness: Keeping the Project Professional
Floor demo generates a lot of material, and how debris is handled changes the entire renovation experience. A strong process uses controlled staging: debris goes into bags, bins, or carts immediately, sharp waste is contained, and heavy material is removed in planned trips rather than piled in hallways.
Responsible disposal matters. Some materials can be recycled, others require special handling, and all of it should comply with local rules. The process should also include a final clean before the next trade enters the room: vacuum with appropriate filtration, wipe down horizontal surfaces, and remove protective barriers carefully to avoid releasing trapped dust.
Final Walk-Through: Confirming the Floor Is Ready for the Next Phase
The demo process ends with a readiness check, not with the last piece of flooring removed. The final walk-through verifies that the substrate is clean, flat, stable, and free of contaminants. Any repairs are complete. Transitions and edges are addressed. The room is safe to work in, and the next trade can start without losing time.
This is also the moment for photos and notes, especially if the project is being managed across multiple trades. Clear documentation supports better decisions and fewer disputes.
For broader context on renovation activity and home improvement topics, a solid baseline reference can be useful during planning and communication. 📚
Authority link: Wikipedia – Home improvement
Conclusion ✅
Floor demo is not just removal. It is a controlled process that protects the home, protects the people doing the work, and creates the foundation for a successful installation. When the scope is clear, the area is contained, safety is taken seriously, and the substrate is evaluated and prepared correctly, demo becomes a momentum-builder instead of a budget-buster.
A professional floor demolition process keeps the project cleaner, safer, and more predictable, so the renovation moves forward with confidence and fewer surprises. 🛠️✨